Porcelain teeth(porcelain crowns or dental crowns) are ceramic copings that are used to cover partially destroyed teeth, cores, or prosthetic abutments that are pieces that are screwed onto dental implants. They can be metal-ceramic (as the name says, it has metal and ceramic in its composition)

or metal free (they only have ceramic in their composition)

It is possible to achieve good aesthetic results with both types, but for the anterior region, it is highly recommended to opt for the metal free type. Metal-ceramic crowns sometimes cause staining of the gums due to oxides released from the metal.

Crowns made in metal free form, can be applied by hand, can be injected

or they can be planned on the computer and milled by a CadCam system and then made up (painted on the surface). If it is done through the CadCam system, the first step is scanning the mouth.

Then comes the crown design on the computer

And finally milling on the 3d milling machine


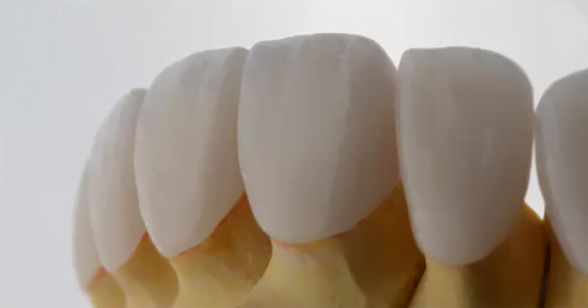
For the anterior region (esthetics) we prefer to do the hand-applied type to mimic both the internal and external color nuances and optical effects seen on natural teeth.
Dental preparation for porcelain teeth
Unlike a porcelain restoration, the preparation for a porcelain tooth requires more grinding. It must cover 360° of the tooth, must allow enough space to make the coping (the layer on which the porcelain is applied), must be extruded (it cannot have divergent walls, they have to be slightly divergent), and the end must be subgingival (below the gum level) so that the crown margin does not appear.

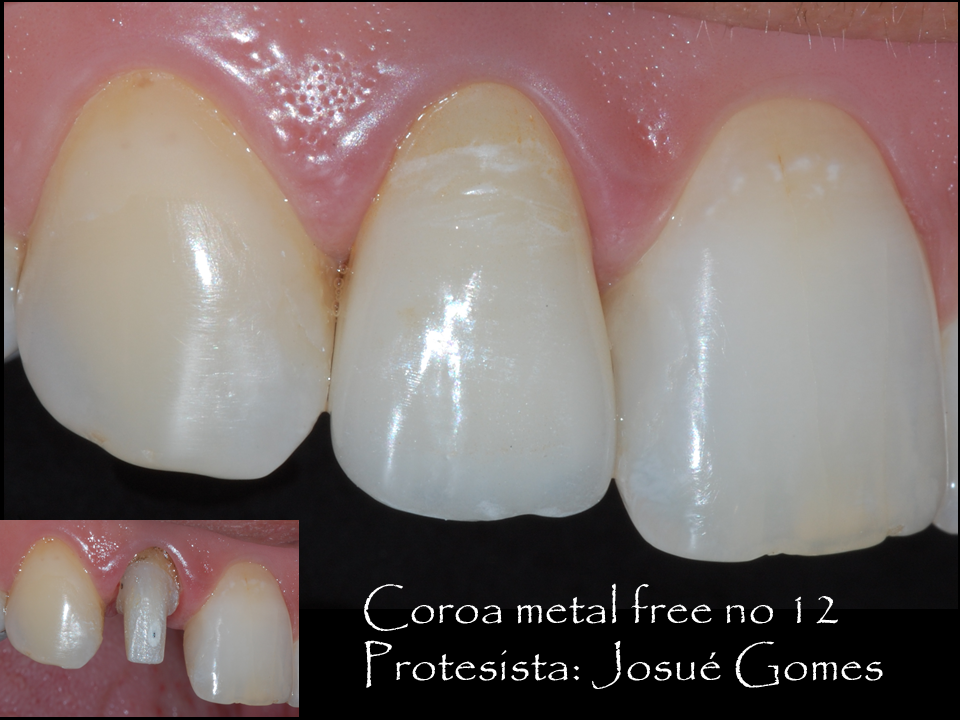
Metal cores for porcelain teeth
When the tooth is badly destroyed, we must treat the canal and make a metal core, which is a piece that is cemented inside the root and serves so that we have a support where the porcelain tooth will be bonded.


Remember that when planning to make a metal-free porcelain tooth, the core must be covered with opaquer so that the color of its metal does not interfere with the final porcelain color.
Porcelain Teeth Clinical Cases

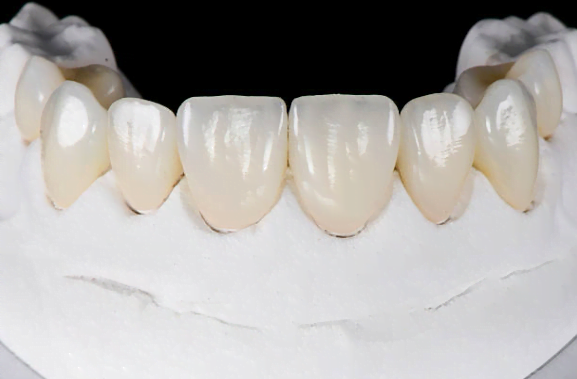


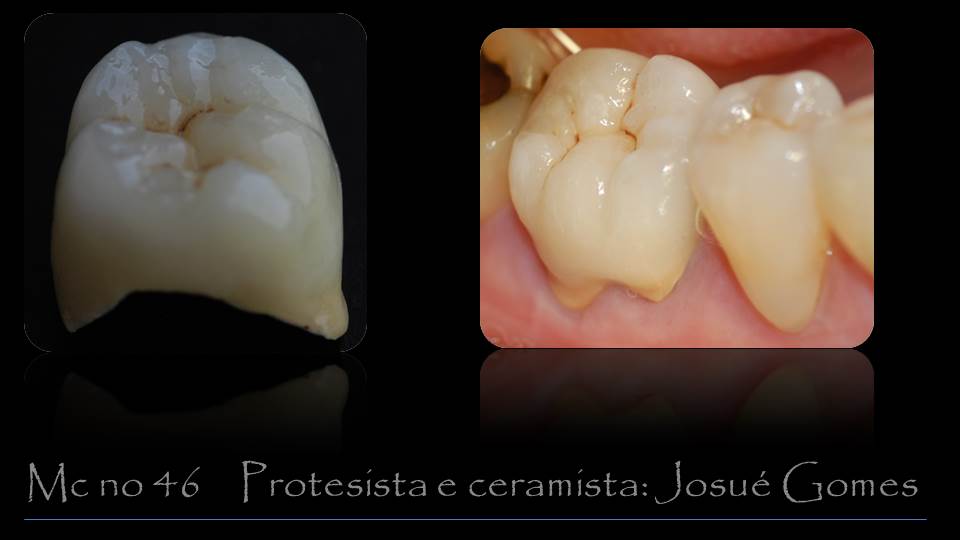
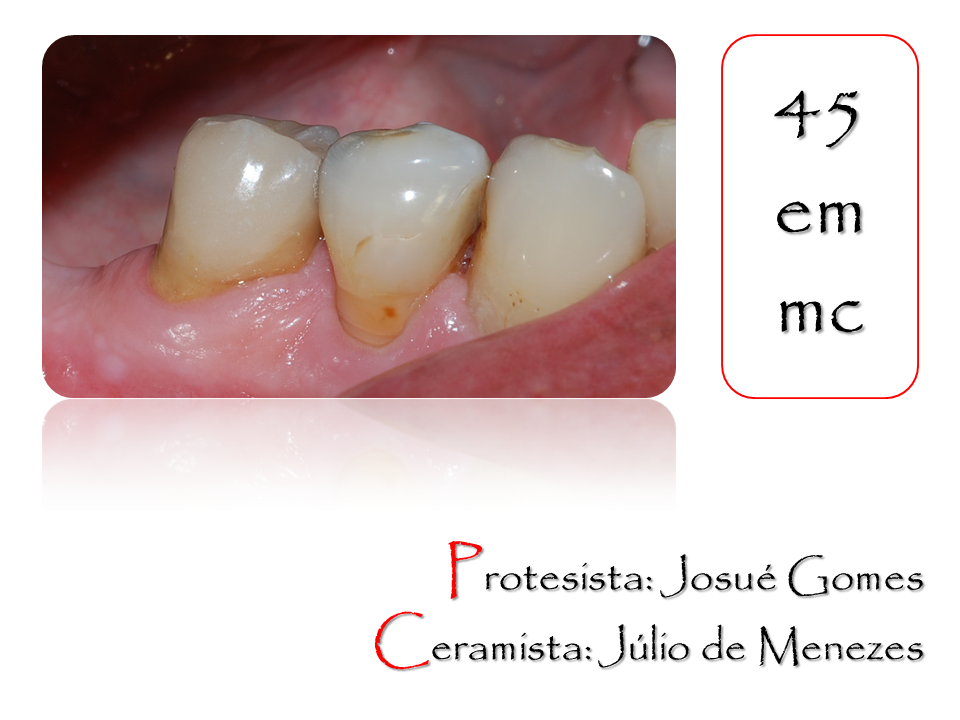


Porcelain teeth before and after
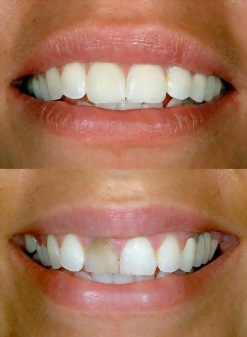


While the porcelain teeth are not ready, the patient is left with temporary teeth that can be made in the conventional way (pressed in resin) or printed on a 3d printer.


Porcelain Teeth Making Tips for Dentists and
Dental Technicians
Choice of color for porcelain application
This is a very important step. Ideally, the technician should take notes of the patient’s tooth color as well as the individual characteristics of the neighboring teeth such as translucency, opalescence, and fluorescence, and not the dental surgeon, unless the dental surgeon is very experienced in prosthodontics or was a ceramist before dental school.
They must have with them all the resources that the porcelain system offers. These annotations are made by comparing the characteristics of the patient’s teeth with standard and system-specific color scales. These scales have the opaque, dentin and incisal modifiers and the special masses such as fluorescent and opalescent.
One should check, before the shade is taken, that the teeth are not dry. This occurs when the patient’s mouth remains open for too long. The teeth must be hydrated for the notes, since this is the only way to verify the optical effects that the tooth structures produce.

Molding for making porcelain teeth
For professionals who do not have the intraoral scanner, impression-taking of the preparation and neighboring teeth is necessary. It represents one of the most critical steps in the process of making a porcelain tooth. We should anesthetize the region of the preparation, place a gingival separating wire so that the impression material will copy well the end of the preparation, otherwise the gingiva will cover the end of the preparation and the material will not copy it well, which would lead to margin imperfection and, consequently, probable infiltration and caries. The retractor wire must be soaked in a hemostatic agent, but we must not forget under any circumstances to remove the excess, using a gauze, before putting it in contact with the gum, since this product, when in excess, can cause necrosis and a lot of pain after the procedure.
Shaping the preparation for making the porcelain tooth. See how the material has penetrated into the space between the tooth and the gingiva due to retraction with retractor wire and see that there is no blood (if present, it could impair the accuracy of the impression).

After the mold is clean and dry, we pour plaster and wait for it to set (harden). After at least an hour, we can remove it from the mold and start the laboratory work.

When it comes to applying the porcelain, the technician should keep in mind that the ideal would be to try to imitate nature.

The porcelain tooth must be built up in layers to mimic what a natural tooth looks like. The first layer is the dentin.

The second and third are the incisals, effect masses, and transparent with or without opalescents.

Opalescence and fluorescence effects.

If we look at a natural tooth, we will see that it usually has a strong, vivid, internal color, which comes from the dentin, and an enamel layer that lightens the tooth and gives a sense of depth.
To reproduce these optical effects, we must have enough space to work with, place an opaquer with a more chromatic color, a thinner layer of dentin and more chromatic than the color of the patient’s tooth, a thicker layer of enamel and incisals.


This way, we manage to get the color of the patient’s tooth and in a way that doesn’t look like an artificial tooth, opaque, which usually stands out from the others, precisely because the opaque sold by the companies is not very chromatized, even less than the color we intend to do, this way we don’t have a good background to work with, that helps us, that collaborates with the final color composition that is the sum of all the layers submitted to the optical effects of the depth of each layer (obviously the innermost layers collaborate less with the final color composition).
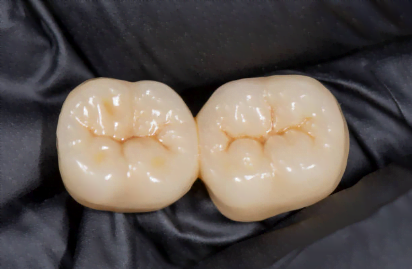
Of course, the shape and surface texture should not be forgotten either.


Adaptation of the porcelain tooth in the mouth
When we receive the porcelain tooth from the laboratory, we must proceed with cleaning it and performing the in-mouth try-in.
First we must check the contact points. We position the crown in place and floss it. This one should pass with a certain difficulty, neither too free nor too tight. If it goes too tight, the proximal contacts should be marked with carbon and the porcelain should be very carefully worn away. If it passes too freely, the crown should be returned to the lab for addition.
Once the contact points of the porcelain tooth are adequate, the next check is the adaptation, the crown margin must be completely against the preparation, to check this we can use an explorer or a light silicone.
The third and final step is occlusal adjustment. First the occlusion is checked in MIC, secondly, the interferences during mandibular excursions are checked. Once everything is checked and adjusted, the porcelain can be returned to the laboratory for the glaze application.